|
|
Tutorial
We are working on a more detailed, graphical tutorial. In the meanwhile, please
see below for a brief overview.
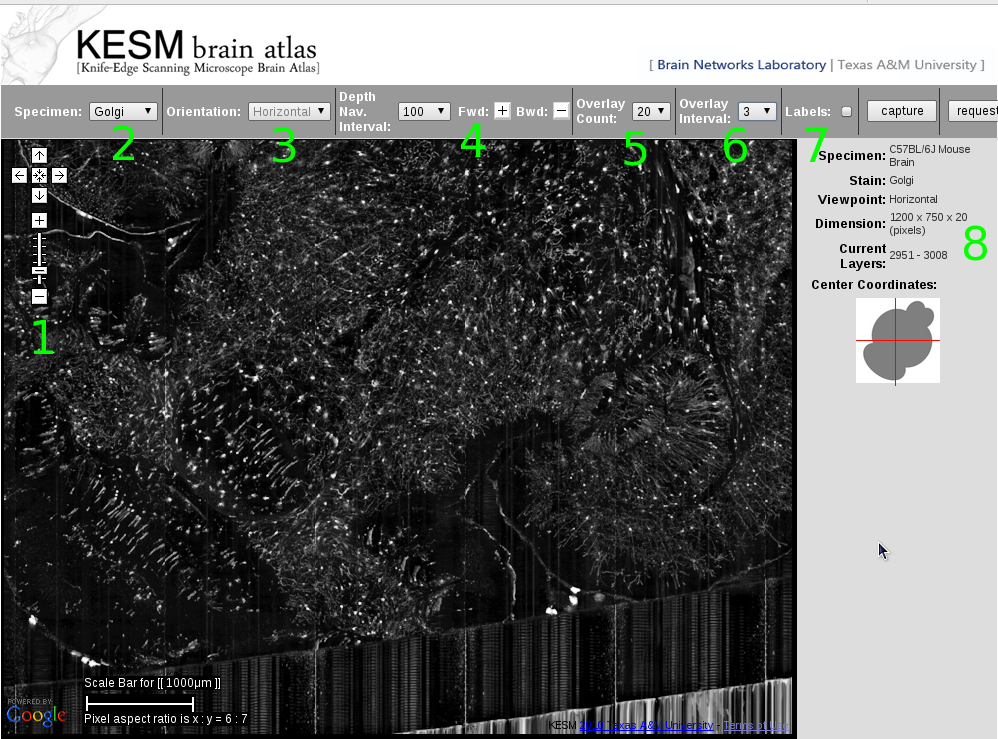
- Zoom-in, zoom-out and navigation are identical to the Google Maps
interface. It helps not to move around while the images
are loading.
- You can select the atlas using the Specimen menu.
- Some specimen has all three views supported. Select the view
using the Orientation menu.
- Navigation in the depth (z direction) is achieved by the Fwd [+] and Bwd [-] button on the menu bar. You can change how many steps to
move at a time (Depth Nav. Interval).
- For slow internet connections, set the Overlay Count to a low value (1 or 5). This value controls how many images to overlay at any given location. Overlay gives the 3D effect. Once you found your favorite spot, then increase
the Overlay Count to a higher value. Usually 20 is a good value.
- Overlay Interval controls how many images to skip between
successive images in the z-stack when overlaying. When you are zoomed
out, set this value to 3 or 5 to view a thicker slab of tissue.
If your Overlay Count was 20 and Overlay Interval 5, you
are effectively looking at a 100 um-thick slab.
- You can turn on the labels by checking the Labels box.
We are still working on a full annotation.
- This panel shows specimen info and current location within the
data set. Current Layers display the depth, and
Current Coordinates shows the lateral location
within the brain.
|
|